Flowers
Coffee-stained Runner
 I laid a beige runner width-wise across my table hoping to tone down the brown, woodsy feel. It worked, but the table setting was as boring as watching paint dry. I tried this knick knack, that lackluster knick knack…still nothing. Everyday there was something different sitting on the table (a refurbished item that I already owned – no shopping sprees here, smiles). Before I could satisfy my crafty whims, oops!…my cup of coffee spilled over and made its way to my runner which soaked it up like a sponge.
I laundered the runner, but it did not help much. I could kick myself for waiting till it was too late to remove the stain with a homemade, effective solution.
I had 2 glass vases on stand-by, swirly straw, a bunch o’ fake grass, faux bamboo stalks, pebbles, and some other stuff that I can hardly define.
After brainstorming and fiddling away in my craft bag….
 I evenly rolled both ends of the runner up till they were about 6″ apart from each other. The runner now resembles a scroll. I divided the grass, swirly straw, faux bamboo and other things up between the two vases, placed one on the desk, and the other in the middle of the “scroll.”
Brown pebbles and glass knick knacks were strategically placed over the stains. Until I get that coffee stain out, this’ll do.
Read Full Post | Make a Comment ( None so far )Sassy Chopsticks in a Vase
 I purchased some chopsticks many years ago via Ebay. The seller slyly passed them off as hair sticks in their listing. When my package arrived I realized that the ends did not have pointed tips and there was no way that one could place them in their hair without snagging and ripping through their mane.
“When given lemons, you make lemon juice” – or however the saying goes (ha).
I wanted to bead them then, sell them as potted plant decor, but I did not feel comfortable with that (future biz venture maybe). After collecting dust in a box for such a long time, I decided to place them in a vase along with some beads. It’s growing on me.
Enjoy!
Read Full Post | Make a Comment ( 3 so far )Update: Sassy Centerpiece
I decided to move my sassy centerpiece from the table on over to the bookshelf. It did its job as a not so cliché focal point, however, it looked rather boring amongst my books. It yearned for something more.
A colorful bow? Maybe. Maybe not.
Flowers? Nah.
More Ikea thingies? Why not?
I decided to add my favorite color to the vase and there you have it, a sassier centerpiece!
I know that I said that I would stay away from this color in order to deflect an unintentional Thanksgiving theme gone wrong in my domain, but I can’t help it for it captivates me. And when I come home tired after running errands, it energizes me. When I am stressing, the mere sight of this hue puts me in a lull. I love earth tones.
Enjoy!
Read Full Post | Make a Comment ( 2 so far )A not so cliche centerpiece

Stalk-like thingies...
Lime Green, Brown and Burnt Orange…is she serious?
Yup!
Let’s start with the table… I could purchase White flowers with bright Lime Green leaves and stems. Hmmmm, too cliché. I’m going for weird here.
I found some stalk-like thingies at IKEA and but they’re way too long. I want them anyway, so in the cart they go.
I had a hard time finding the right size floor vase for these things and on top of that, they did not look right no matter where I placed them. Okay, let’s think….what shall I do with these?
Got it!

Sassy Centerpiece
Enjoy!
Read Full Post | Make a Comment ( None so far )Tin Can Faux Flower Pot
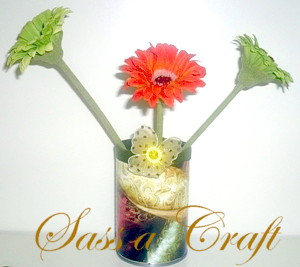
Tin Can Faux Flower Pot
- tin can
- faux flowers
- hot glue gun and glue stick
- glossy page from an old magazine
- matching ribbon
- needle and thread
- scissors
- beads and faux gem
- mesh butterfly hair clip
1. Remove label from the empty tin can.
- Empty can
- Be sure to remove glue/paper from the can where the label used to be for a smooth finish.

Magazine page
3. After choosing a page from an old magazine, size it up to the can. Mark how much is needed, then snip away.
- Don’t worry if you happen to snip too much, the ribbon will cover the edges of the paper.
- Do not spread the glue over the whole page (or the paper will become lumpy).
- Use the thickest, glossiest paper available.
- Glue 1/4 of the page (only) starting at the ends. This will decrease your chances of having a lumpy outcome, especially at the front of the flower pot.

Waiting and waiting...

- Pretest: If you’re going to use small seed beads, make sure your needle will fit through the holes without a problem.
- If securing the thread with knots after beading proves difficult, simply dab a small amount of glue from the hot glue gun on the ends of the thread, then lightly press them on the back of the butterfly.
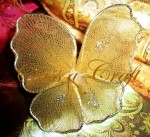
Old Butterfly Hairclip ~ Before Shot

Old Butterfly Hairclip ~ After Shot

- Faux gems from old costume jewelry
*Use a hot glue gun to affix the gem to the center of the butterfly. A glue stick will not do the job in this case.
- Before gluing the ribbon on the brim of the can, fold it evenly in half (lengthwise) making sure both sides of the ribbon meet, then iron a crease down the middle. This will be your “guide” while gluing the ribbon on the can and will help you to achieve an even fit.
-
Gluing the inner side of the can gives you more leeway to cover possible mistakes.
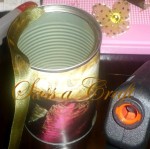
Inner side of can
- Do not spread the glue all around the brim. Instead, glue the ribbon little by little. Press firmly to secure its proper place. What’s great about hot glue is that it gives you time to adjust your craft before it dries should you err.
- Should you forget, or opt not to start at the back, cover flaws created by the ragged ribbon edges by placing the butterfly over it once the gluing is complete or decorate the can with short stemmed flowers instead of long ones (like mine) so that the petals grace the rim.
- Cover the bottom rim of the can with ribbon if you please.
- Allow it to dry.
